
foreman架构:

本文主要讲述搭建foreman,及集成进nginx的过程
环境说明:
CentOS 5.8 x86_64
puppet version:3.1.1
master hostname:server.domain.com
client hostname:client.test.com
----------------------------------------------
- 1,puppet,nginx环境
- 均按上篇文章所部署安装好puppet,nginx,ruby等
- 2,配置yum源
- # rpm -ivh http://yum.theforeman.org/releases/1.1/el5/x86_64/foreman-release-1.1stable-3.el5.noarch.rpm
- 3,安装foreman,foreman-proxy
- # yum -y install foreman-installer
- # ruby /usr/share/foreman-installer/generate_answers.rb
- 分别输入三次 y
- # yum install ruby-mysql
- # yum -y install foreman foreman-proxy
- # chown foreman.foreman -R /usr/share/foreman
- # su - foreman -s /bin/bash -c /usr/share/foreman/extras/dbmigrate
- # vim /usr/share/foreman/config/database.yml
- 原文件为sqllite的配置,此处改为mysql作为数据库存储
- =================================================
- production:
- adapter: mysql
- database: puppet
- username: puppet
- password: puppet
- host: localhost
- socket: "/tmp/mysql.sock"
- =================================================
- mysql> create database puppet CHARACTER SET utf8;
- mysql> grant all privileges on puppet.* to puppet@'localhost' identified by 'puppet';
- mysql> flush privileges;
- # cd /usr/share/foreman/
- RAILS_ENV=production rake db:migrate
- rake puppet:migrate:populate_hosts RAILS_ENV=production
- # chown foreman.foreman /usr/share/foreman/tmp/secret_token
- # vim /etc/foreman-proxy/settings.yml
- ==========================================================
- :trusted_hosts:
- - server.domain.com
- :puppetca: true
- :puppet: true
- :puppet_conf: /etc/puppet/puppet.conf
- =========================================================
- # /etc/init.d/foreman-proxy start 启动proxy 端口8443
- 4,集成进nginx
- nginx虚拟主机如下:
- server {
- listen 443;
- server_name server.domain.com;
- ssl on;
- ssl_certificate /var/lib/puppet/ssl/certs/server.domain.com.pem;
- ssl_certificate_key /var/lib/puppet/ssl/private_keys/server.domain.com.pem;
- #Verify puppetmaster clients against Puppet CA
- ssl_crl /var/lib/puppet/ssl/ca/ca_crl.pem;
- ssl_client_certificate /var/lib/puppet/ssl/certs/ca.pem;
- ssl_verify_client optional;
- ssl_verify_depth 1;
- access_log /usr/local/nginx/logs/foreman_access.log;
- error_log /usr/local/nginx/logs/foreman_error.log debug;
- root /usr/share/foreman/public;
- passenger_enabled on;
- passenger_set_cgi_param HTTPS on;
- passenger_set_cgi_param SSL_CLIENT_S_DN $ssl_client_s_dn;
- passenger_set_cgi_param SSL_CLIENT_VERIFY $ssl_client_verify;
- }
- # /etc/init.d/nginxd start ###启动nginx
- 5,访问foreman
- 输入网址:https://server.domain.com
- 默认账号:admin 密码:changeme
- 进入之后配置more-configureation-smart proxies----
- 添加proxy地址: https://server.domain.com:8443
- #vim /etc/puppet/node.rb
- :url => "https://server.domain.com",
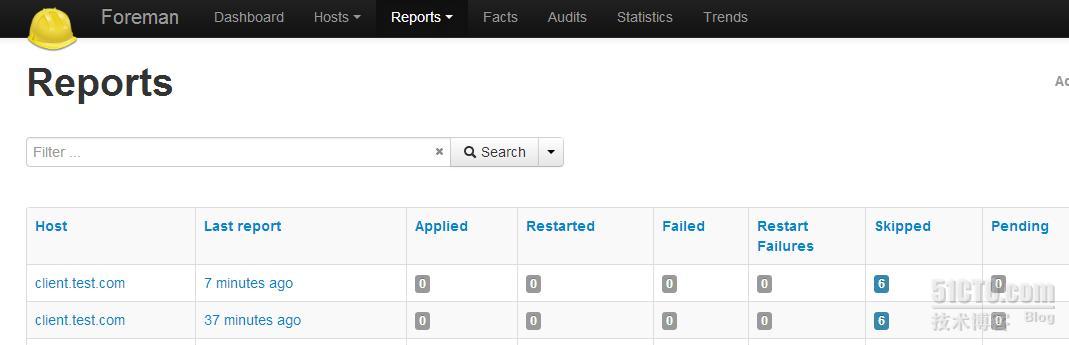
- 6,设置report自动导入foreman
- # cp /usr/share/foreman-installer/foreman/templates/foreman-report.rb.erb /usr/lib/ruby/site_ruby/1.8/puppet/reports/foreman.rb
- # vim foreman.rb
- 修改成一下配置,其他不变(ps:一直就是卡在住错)
- #<%= ERB.new(File.read(File.expand_path("_header.erb",File.dirname(file)))).result(binding) -%>
- # copy this file to your report dir - e.g. /usr/lib/ruby/1.8/puppet/reports/
- # add this report in your puppetmaster reports - e.g, in your puppet.conf add:
- # reports=log, foreman # (or any other reports you want)
- # URL of your Foreman installation
- $foreman_url = 'https://server.domain.com'
- # if CA is specified, remote Foreman host will be verified
- $foreman_ssl_ca = "/var/lib/puppet/ssl/certs/ca.pem"
- # ssl_cert and key are required if require_ssl_puppetmasters is enabled in Foreman
- $foreman_ssl_cert = "/var/lib/puppet/ssl/certs/server.domain.com.pem"
- $foreman_ssl_key = "/var/lib/puppet/ssl/private_keys/server.domain.com.pem"
- 客户端需修改
- agent配置如下
- [agent]
- classfile = $vardir/classes.txt
- localconfig = $vardir/localconfig
- report = true
- pluginsync = true
- masterport = 8140
- environment = production
- certname = client.test.com
- server = server.domain.com
- listen = true
- 服务器端修改
- [master]
- autosign = $confdir/autosign.conf { mode = 664 }
- reports = log,foreman
- external_nodes = /etc/puppet/node.rb
- node_terminus = exec
- ca = true
- =======================
- 7,class,host.facts导入foreman
- #cd /usr/share/foreman
- #导入hosts 和facts
- rake puppet:import:hosts_and_facts RAILS_ENV=production
- 把/etc/puppet/modules底下的模块都复制至/etc/puppet/modules/production
- 在foreman web管理
- mode---configuration---puppet classes
- 点击import from server 即可
主要截图如下:


这样puppet系列文章已基本完成;
在此感谢下itnihao,liu.cy的指导 (ps:为了文章的完整性,所以引用了大量itnihao文章的内容)


相关推荐
流浪者+木偶+铁轨 将创建以下环境 Ubuntu 12.04 nginx 独角兽 Ruby(rbenv) 打捆机 导轨 邮局 要求 ... 与团队合作,创建一个 VM 以在团队... 您可以使用 puppet 目录中的 config.yml 文件修改其中的许多设置。 此存
puppet-nginx 是 Puppet 的扩展模块用来管理 Nginx 服务器。
[NGINX + MYSQL + PHP7] + MongoDB 这是一个简单的无所事事的ubuntu / trusty64框,其中包括用于运行LEMP开发环境的所有必需的人偶模块。 现在还包含XDebug 2.4,用于调试需求。什么是无业游民? Vagrant是一种工具...
用于Puppet的NGINX模块 该模块已从James Fryman 迁移到Vox Pupuli。 安装或升级 请注意:该模块正在进行结构维护。 您可能会遇到次要版本之间的重大更改。 这个模块管理NGINX配置。 要求 人偶4.6.1或更高版本。 ...
ngnginx关于非-肿的Nginx Puppet模块已在Ubuntu 10.04、12.04、14.04和16.04(LTS)上进行了测试。 大多数配置(几乎所有)都在虚拟主机(其他模块)中完成。
在CentOS系统下安装Puppet和Puppet Foreman的教程.docx
puppet模块的修订版2.0使用了综合总线,但是它以脆弱的方式从aws下载了软件包。 随着云软件包的问世,是时候再次重写以使用存储库了。 vshn击败了我,并编写了一个出色的人偶模块,准确地说明了我将如何重构这个...
该存储库包含基于 Docker 容器(由 Puppetmaster、Foreman 和 PuppetDB 组成)设置本地 Puppet 开发堆栈所需的所有脚本和配置。 它在我的有完整的描述。 用法 有多个工具的脚本和配置文件。 您需要在系统上安装以下...
注意:Puppet 不能降级软件包。 service - 确定service的状态。 有效值: running或stopped 。 默认值: running 。 onboot - 是否在启动时启用或禁用服务。 有效值: true或false 。 默认值: true - 启用。 ...
puppet学习之路,puppet文档,foreman,func…………
-puppet nginx 管理 -puppet kick 介绍 -puppet MCollective 介绍 - puppet func 介绍 5.puppet 架构与集群 -puppet 架构 -puppet 集群方案 - puppet 集群核心思想 -puppet性能测试方法 6. QA -puppet ...
puppet 入门 ,puppet 中文,puppet安装
puppet 3 Beginner's Guide 以及 Puppet 3 Cookbook 打包下载
puppet-redis, 没有主动开发 redis Puppet 模块 Puppet 模块 安装和配置 redis 。用法安装redis服务器和客户端以获得合理的默认值。include redis安装具有版本 2.6.5的redis服务器和客户端。class {
Puppet 运维自动化章节目录 一、 Puppet 介绍 1. 2014年新增Puppet 微信公众平台,欢迎各位大神交流学习 2. 如何将Puppet模块生成带有箭头关系依赖图 3. 如何从互联网获取 Puppet的各项特殊资源 4. Puppet...
Magento-Vagrant-Puppet-Nginx 安装次数 Magento MySQL PHP PHP-FPM Nginx的 n98-玛格伦 设置 git submodule init git submodule update vagrant up 修改人偶/清单/base.pp class { "magento" : install_...
nginx php 使用 PHP-FPM 安装和配置 Nginx 的 Puppet 模块。 该模块还将允许您安装适当的 PHP 环境。 依赖项:'puppetlabs/apt','>=1.1.0''puppetlabs/stdlib','>=3.2.0' 只能在 ubuntu 12.04 或 12.10 上运行...
配置管理软件有很多,最出名的是cfengine,但是cfengine的语法比较晦涩,于是出现了puppet 。puppet的语法简单,对管理内容的抽象很好,很容易理解代码,因此最近正迅速的流行开来。puppet是免费开源软件。可以自由...
With this book, you'll be up and running with using Puppet to manage your IT systems. Dive right in with basic commands so that you can use Puppet right away, and then blitz through a series of ...